解放工程師的雙手,你需要好的 CI/CD ─ 搞定 gitlab-ci + 環境變數
上一篇搞定 gitlab-runner 的各種設定以後,現在馬上讓我們來建立一個簡單的 gitlab-ci 測試看看吧~
喔對了.gitlab-ci.yml,檔名前面記得加.,不要跟我一樣耍笨喔 😓。
# .gitlab-ci.yml
stages:
  - deploy
deploy-job:
  stage: deploy
  script:
    - echo "Hello, $GITLAB_USER_LOGIN!"
    - pwd
    - whoami
    - echo "This job deploys from the $CI_COMMIT_BRANCH branch."
  only:
    - master
  tags:
    - test-runner
- stages: 定義這個 pipeline 有幾個不同階段,這個例子只有一個階段
deploy(意味著你在 Settings/CI/CD/Pipelines 就只會看到一個圈圈)。 - deploy-job: 定義了一個 job 名為
deploy-job,stage: deploy表示這個 job 對應到deploy階段。 - script: 這邊寫下你需要在機器上運行的指令。
- $GITLAB_USER_LOGIN, $CI_COMMIT_BRANCH: 此為 Predefined Variables,為 Gitlab 事先幫你定義好的一些變數,詳情可參考官方文件。
- pwd: 個人覺得顯示當前路徑 Debug 還蠻方便的,如果 pipeline 有什麼異常,可以直接進到機器的該目錄底下檢查,通常是
/home/gitlab-runner/builds/xxxxxxxx/0/your-project。 - only: 限制這個 job 在某些條件下進行,注意條件是 OR,例如:
only:
  - master
  - tags
這個 job 只會在 master 分支或是下 tag 的時候觸發,如果需要 AND 請轉用 rules:。
- tags: 此 tag 非彼 tag,這是指定要讓哪個 runner 跑的 tag,還記得嗎?我們上一篇文章在建立 runner 的時候有輸入 tag,這時候就派上用場了。注意跟
only:不同,這邊的邏輯是 AND。例如:
tags:
  - test-runner
  - production-runner
代表這個 job 只能在同時具有 test-runner + production-runner 這兩個標籤的 runner 上面跑 (每個 runner 可以設定多個 tag),如果一個 job 找不到符合條件的 runner,你會在 pipeline 看到它永遠是 pending 的狀態。
有了上面這份 gitlab-ci 以後,趕快把你的 commit push 到 master 吧!不久後你就可以看到 pipeline 的成功訊息了。
接著後讓我們根據需求開始擴充這個 CI 吧~
搭配環境變數
如果是 React 專案的話,可能會有多個 .env 檔案,我們假設專案內有.env.development, .env.uat, .env.production,分別對應到三種不同的執行環境。
不知道怎麼擴充使用 env 的,可以參考我之前寫的這篇文章。
這時候,我們要做的就是讓 CI 可以依據不同的 branch,執行不同的 build 指令,例如在 uat 環境是 npm run build:uat,在 production 環境則是 npm run build。
一般來說如果你使用 Docker executor,可以這樣做:
# .gitlab-ci.yml
stages:
  - build
build-for-uat:
  stage: build
  image: node:20
  script:
    - npm run build:uat
  only:
    - uat
  tags:
    - uat-runner
build-for-production:
  stage: build
  image: node:20
  script:
    - npm run build
  only:
    - master
  tags:
    - production-runner
需要注意的是要記得開兩台 runner,一台對應到 uat 環境,而另一台對應到 production 環境。
不過由於我在之前就已經把Dockerfile, docker-compose.yaml, nginx.conf都寫好了 (詳情可看這篇文章),所以只需要 gitlab-ci 模擬手動部署的指令,因此我選擇使用 Shell executor,目標是要根據不同的 branch 來執行不同的docker compose up指令:
# .gitlab-ci.yml
stages:
  - deploy
deploy-to-uat:
  stage: deploy
  script:
    - sudo docker compose --env-file .env.uat up --build -d
  only:
    - uat
  tags:
    - uat-runner
deploy-to-production:
  stage: deploy
  script:
    - sudo docker compose --env-file .env.production up --build -d
  only:
    - master
  tags:
    - production-runner
可以發現我透過分支的不同引入了不同的環境變數檔,檔案內容為:
# .env.uat
RAECT_APP_CLIENT_ID=xxx
...
DEPLOY_ENV=uat # 變數一
PROXY_URL=http://x.x.x.x:port # 變數二
# .env.production
RAECT_APP_CLIENT_ID=xxx
...
DEPLOY_ENV=production # 變數一
PROXY_URL=http://y.y.y.y:port # 變數二
這邊雖然與前端共用同一份環境變數,但別擔心,只要沒加上 REACT_APP 前綴就不會被 webpack 打包。
我這次用到了兩個環境變數:
- DEPLOY_ENV: 讓 Dockerfile 判斷當下執行環境,然後根據環境來下不同的
npm run build指令。 - PROXY_URL: 不同機器所需要的代理伺服器 ip 也不同。
環境變數匯入以後,接著就是如何在 docker 內使用了~
首先你會需要在 docker-compose 內部加入 build-time variables (該變數只能在 build image 的階段使用,如果要在容器運行時使用請改用environment):
# docker-compose.yaml
services:
  web:
    build:
      context: .
      args:
        DEPLOY_ENV: ${DEPLOY_ENV} # 變數一
        PROXY_URL: ${PROXY_URL} # 變數二
然後在 Dockerfile 當中引入該變數進行判斷:
# Dockerfile
FROM node:20 as build
ARG DEPLOY_ENV
ARG PROXY_URL
...
RUN npm config set proxy $PROXY_URL
RUN npm config set https-proxy $PROXY_URL
...
RUN if [ "$DEPLOY_ENV" = "uat" ]; then \
      npm run build:uat; \
    else \
      npm run build; \
    fi
注意:
if [ "$DEPLOY_ENV" = "uat" ]中括號內部一定要有左右空格,否則會語法錯誤,我當初因為這個 Debug 了很久 😥。
到這裡你已經根據不同環境執行了對應的 npm run build 指令,也成功處理了每台機器不同 proxy 的狀況,若有需要,你也可以自行新增其他環境變數,趕快來測試看看吧!
加入 SSL 憑證
接下來為你的網站加上 SSL 吧~關於一些設定細節可以看這篇文章。
# .gitlab-ci.yml
stages:
  - deploy
cache:
  path:
    - ssl/
deploy-to-uat:
  stage: deploy
  before_script:
    - echo "I'm going to bind ssl certificate for your website..."
    - mkdir -p ssl/
    - echo "$NGINX_SSL_CERT" > ssl/nginx-ssl.crt
    - echo "$NGINX_SSL_KEY" > ssl/nginx-ssl.key
  script:
    - sudo docker compose --env-file .env.uat up --build -d
  only:
    - uat
  tags:
    - uat-runner
deploy-to-production:
  stage: deploy
  before_script:
    - echo "I'm going to bind ssl certificate for your website..."
    - mkdir -p ssl/
    - echo "$NGINX_SSL_CERT" > ssl/nginx-ssl.crt
    - echo "$NGINX_SSL_KEY" > ssl/nginx-ssl.key
  script:
    - sudo docker compose --env-file .env.production up --build -d
  only:
    - master
  tags:
    - production-runner
我們在 job 中新加入了 before_script 階段來預先建立 SSL 憑證的檔案,當中使用到的兩個環境變數:$NGINX_SSL_CERT、$NGINX_SSL_KEY 請先到 Settings/CI/CD/Variables 進行設定:
(另外 gitlab-ci 也有 cache 的功能可以讓檔案在不同 job 或 pipeline 當中共用,像這裡就把 ssl/內容快取住了。)
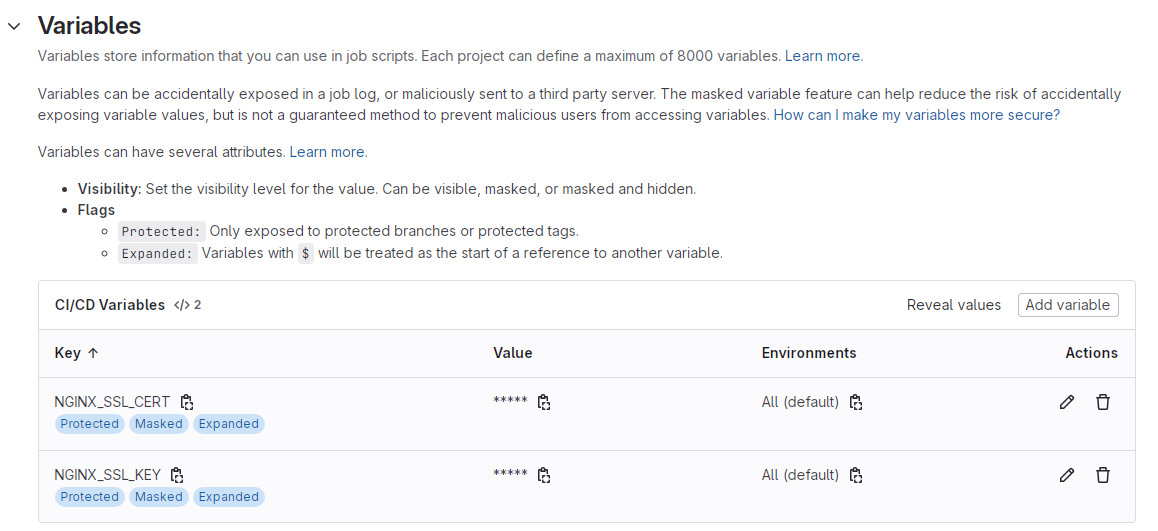
設定變數的時候記得選擇 "Protect variable" 喔!畢竟 SSL 憑證算是私密資訊,這個設定會讓 Gitlab 額外判斷只有跑在 protected branch or tag 的 pipeline 才能取用該變數。
還記得嗎?我們之前在docker-compose.yaml檔案中有加上:
volumes:
  - ./ssl:/etc/nginx/ssl
所以我們在 CI 加上這個步驟以後,container 內部的 nginx 就可以吃到外部掛載的 ssl 檔案了!
錨點 (Anchor)
覺得 CI 程式重複的部分有點多,想要抽離出來嗎?這邊剛好有一個被稱作錨點的 syntax 可以完成!當然,這完全是 optional 的,但如果你跟我一樣是個有潔癖的工程師,那就繼續看下去吧!
# .gitlab-ci.yml
stages:
  - deploy
cache:
  path:
    - ssl/
.deploy-job: &deploy-job
  stage: deploy
  before_script:
    - echo "I'm going to bind ssl certificate for your website..."
    - mkdir -p ssl/
    - echo "$NGINX_SSL_CERT" > ssl/nginx-ssl.crt
    - echo "$NGINX_SSL_KEY" > ssl/nginx-ssl.key
deploy-to-uat:
  <<: *deploy-job
  script:
    - sudo docker compose --env-file .env.uat up --build -d
  only:
    - uat
  tags:
    - uat-runner
deploy-to-production:
  <<: *deploy-job
  script:
    - sudo docker compose --env-file .env.production up --build -d
  only:
    - master
  tags:
    - production-runner
嗯!看起來舒服多了。
一些補充
實作到這邊,理論上你已經完成了專案初步的 CI/CD,它可以自動判斷不同 branch 的 commit 來幫你把專案部署到不同機器上。
當然如果你想改為下 tag 的時候部署,可以這麼做:
only:
  - tags
或是你也可以簡單校驗一下 tag 格式:
only:
  - /^v\d+\.\d+\.\d+$/
總之,這份 CI 還有很多地方可以讓你擴充,這部分就留給讀者自己挖掘了 (例如串接自動化測試)。
結語
還記得我第一次拼拼湊湊 CI/CD 的過程,自己看 pipeline log,自己進 container 偵錯,一行一行的撰寫 yml,最後當我在 Gitlab 看到那個打勾的綠色圈圈,粗俗一點講,就像是三天便秘終於暢通的那種感覺,如果可以,我也想讓你經歷那種專屬於工程師的美好時刻 (除了味道以外 😝)。